Why would you need a Solar Trickle Charger?
Being a weekend warrior type family brings the challenge of keeping your camper battery ready to go for the short trips, which sometimes have some significant gaps in between. To avoid the task of removing the travel trailer’s battery and charging it at your house during the gaps in between trips a Solar Trickle Charger may be right for you. The requirements outlining this solution were:
- Permanently mounted to the travel trailer without putting holes in the roof
- Must be easy to disconnect
- Keep the battery charged while in storage for up to 45 days
This article is focused around the Coleman labeled 2W Solar Trickle Charger found on Amazon.
 Initial Modifications to the Solar Tickle Charger Setup

Right out of the box, the Coleman Solar Trickle Charger would require modifications:
- The alligator clamps weren’t a good solution while the trailer was in motion
- The suction cup mounts don’t work as a permanent mount
Main concerns for using a Solar Trickle Charger
- Mounting location to maximize sun exposure
- Wire routing to prevent issues when towing
- Knowledge of Solar Panel (charge controllers, inverters, etc.)
Mounting Location for Solar Panel
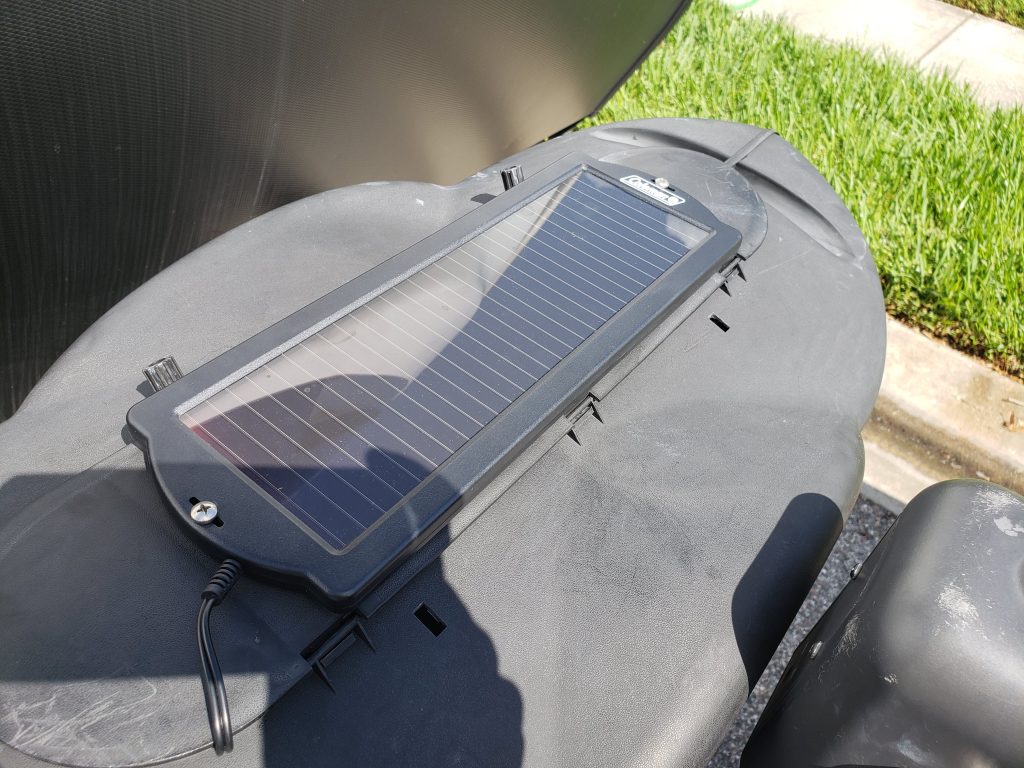
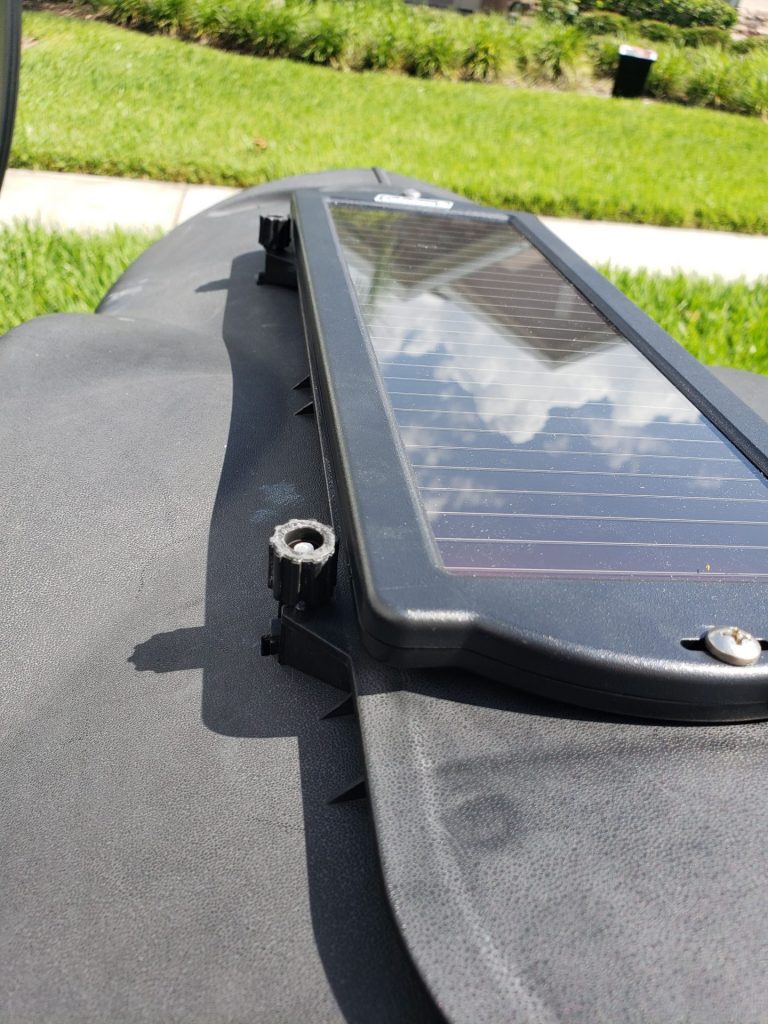
Not a fan of putting holes in the roof of a travel trailer leaves very few options for permanent mounting locations with good sun exposure. Evaluating the trailer from front to rear, the highest point (excluding the roof) is the tongue jack or propane cover. Based on the size of the solar powered charger, the removable panel of the propane cover seemed to be the ideal mounting location.
Procuring some screws from a junk bucket, two holes later the solar charger was secured to the propane cover.
Modifications to Wiring Harness
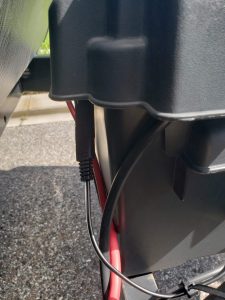
The wiring harness that came out of the box had alligator clips. This was not going to work for a mount that was going to work during transit as the vibration would like cause the clips to come loose. The following modifications were required to mount the SAE wiring harness more securely on to the battery:
- Cut off the alligator clips
- Strip about 3/8″ of wire from the end of the connector cables
- Attach heat shrink ring terminals to the positive (+) and negative (-) cables
- Attach positive (+) lead to battery (as shown below)
- Attach negative (-) lead to battery (as shown below)

Wiring Routing to Battery
The goals of running the connection to the battery were as follows:
- Ensure the Solar Panel could remain connected while the trailer is in transit
- Do not interfere with operation of existing equipment
- Wires did not hang below the chassis and become a risk for being grabbed by road debris
- Wires should not interfere with the removal of the propane cover
To begin the routing of the wire, use the following path:
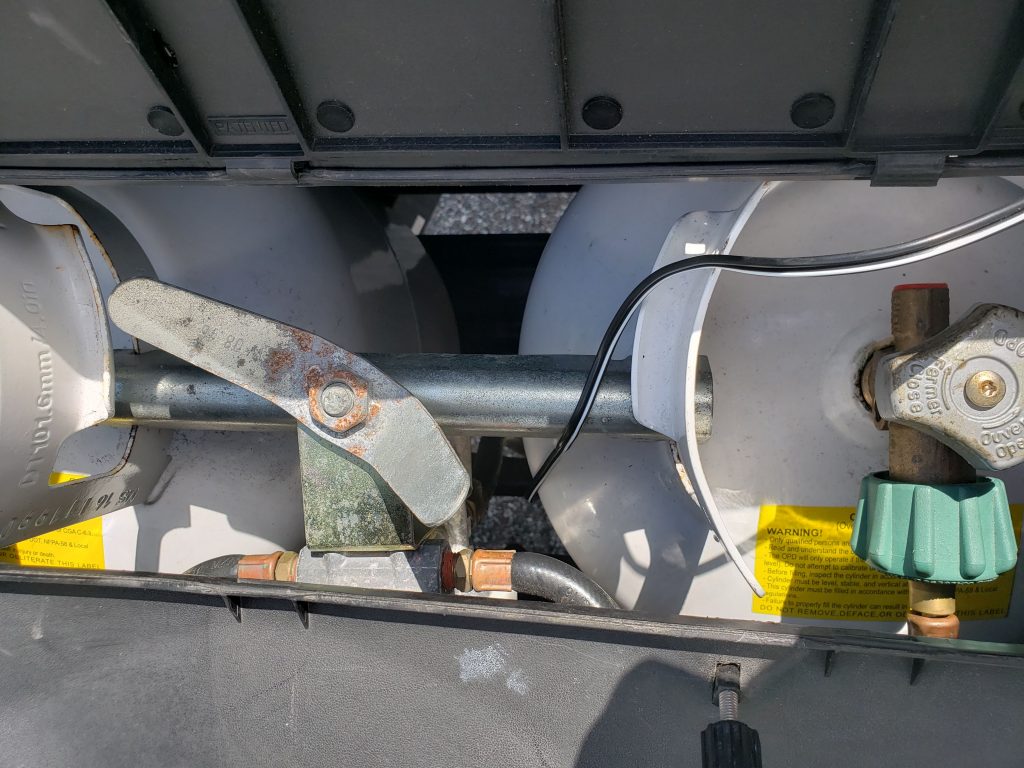
- Run the wire along the left side (facing the front cap) of the propane cover flip opening
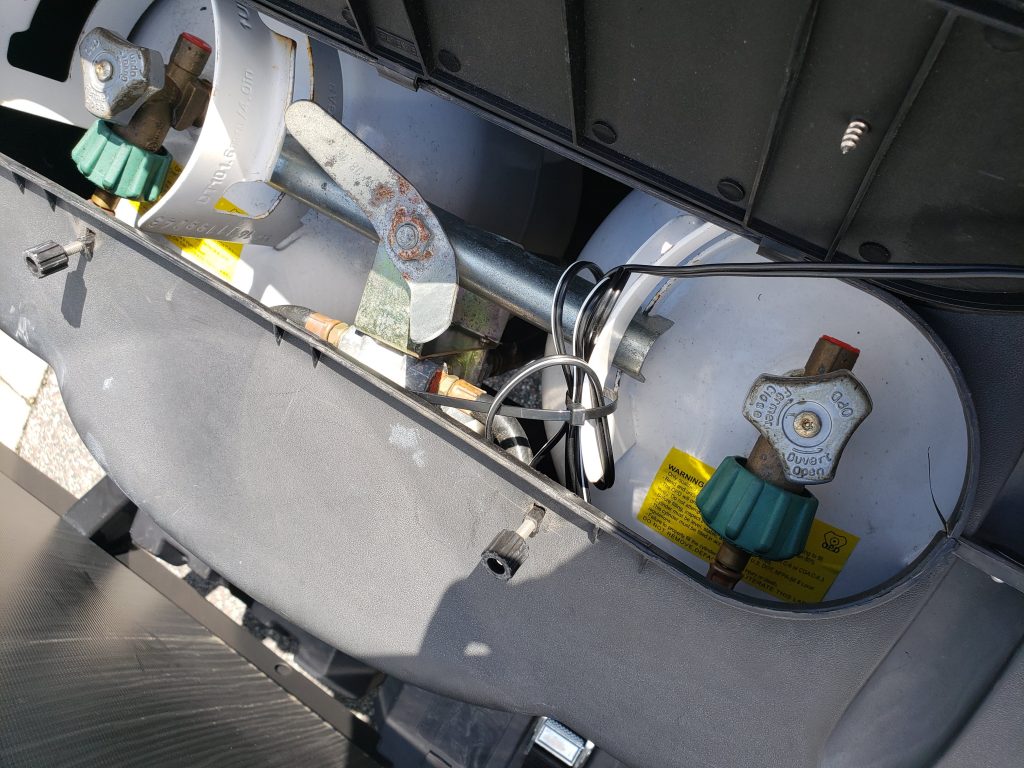
- Navigate the wire down between the 2 propane tanks
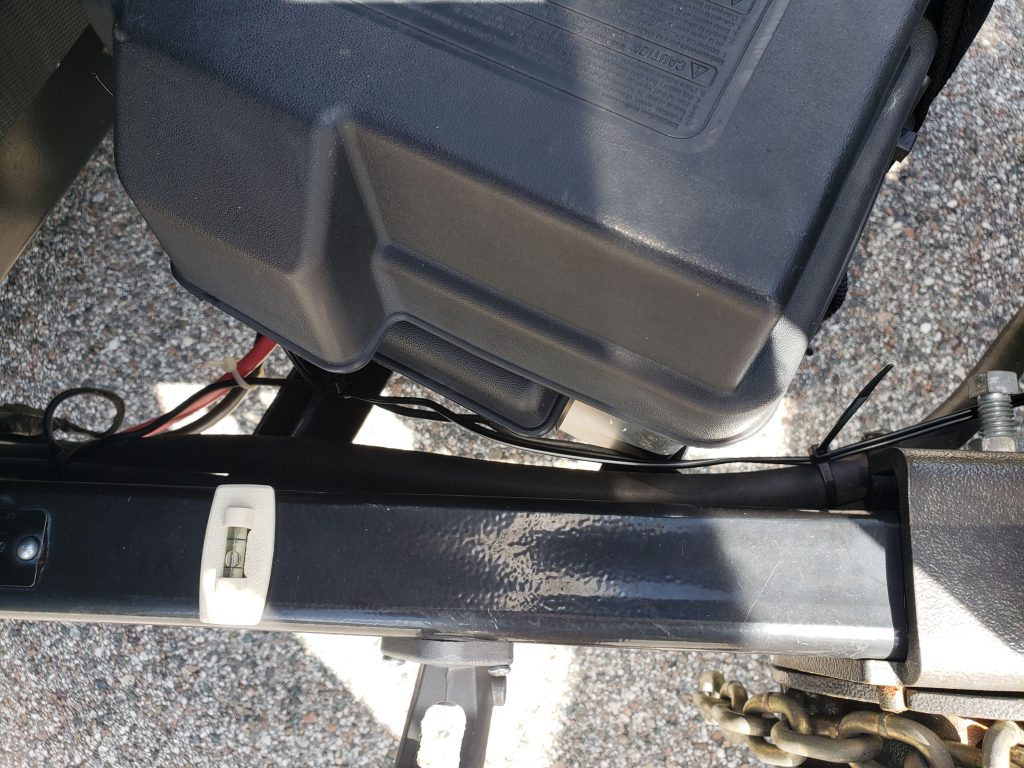
- Route wire along existing wiring harness towards the battery (secure with zip ties)
- Connect SAE connector on back side of battery box between front cap and battery box
- Wind loose wire at top of propane tank opening and secure to bracket using a zip tie or removable clamp
- Close propane cover and secure with thumb screws
- Note: The pictures show a zip tie, which you will need to cut if you’re removing the propane cover. I’m going to look at using one of those plastic wire clamps for an easier solution in the future.
Solar Trickle Charger Test Results
So far we’ve had this trickle charger on for a couple of months. We store our Grand Design Imagine 2800bh in an outdoor storage lot in Central Florida, so during the summer months sun is plentiful. We have left the camper in storage for as much as 4 weeks, and the battery gauge has read full. For the future voltage readings will be posted to compare summer sun exposure vs. winter sun exposure. but for the price, at least in the summer this keeps me from bringing the battery home and charging in garage for our next trip.